
# Navigator
The Navigator is a dockable panel inside Revit. This panel displays the markups in your design platforms project. It allows a user to pick any markup in the panel list. It will then automatically jump to the correct sheet and zoom into the markup location and display the markup from the PDF directly over the top of the Revit View with temporary graphics. This allows the user to quickly fix any issue and move onto the next markup.
# Navigator Layout (Views)
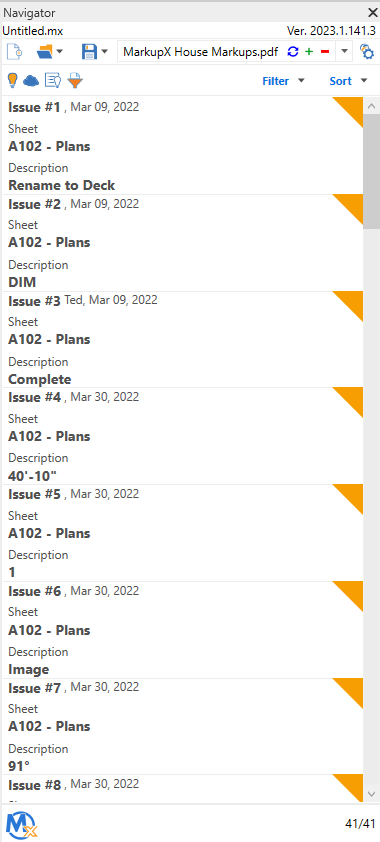
The Navigator Panel has two views; Layout and Edit. The Layout View displays all the Issues/Markups in a list. This view is used to filter/sort and to quickly navigate to a specific Issue/Markup. The Edit view is used to change statuses, create/edit comments, display the original PDF and to close out an Issue/Markup for review.
The images below show both views.
# Opening Navigator
This command will open and close the Navigator Panel. 
Click on the Navigator Button on the MarkupX Ribbon.
The navigator penel is displayed.
Note: Like other Revit and AutoCAD dialog boxes, this panel can be docked.
# Import a PDF
Once a project has been created, the user will then need to import PDFs with markups. This command allows the user to browse to a location where their PDFs are stored and load them into the project.
Note: More than one PDF can be loaded into a project.
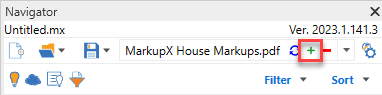
- On the Navigator Panel, click on the first icon to the right of the dropdown list named Import Project.
The Open Issues File dialog is displayed.
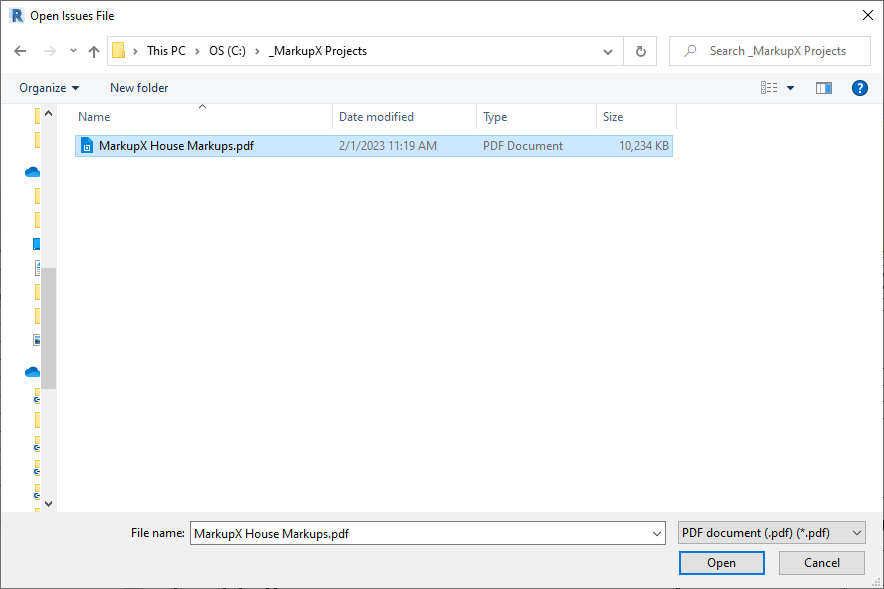
- Browse to a location where there is a PDF with markups.
- Select the PDF in the folder.
- Click Open.
Note: If there are markups in this PDF, they will be imported into the Navigator Panel. This is called the List View.

# Zoom to Markup
When addressing markups, some of the most time-consuming tasks are selecting the correct sheet(s) and zooming to the correct location of the markup and correlating that data with your current markup software. With MarkupX, a user can do both tasks in one easy step.
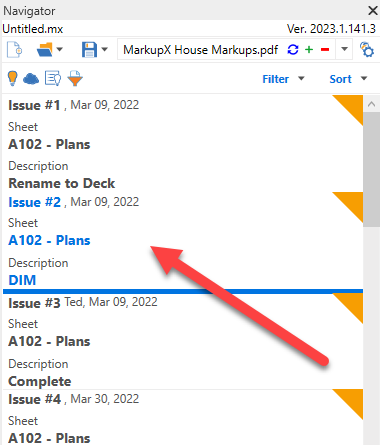
- On the Navigator Panel, click on an Issue/Markup.
The image below shows an Issue/Markup after it has been selected.
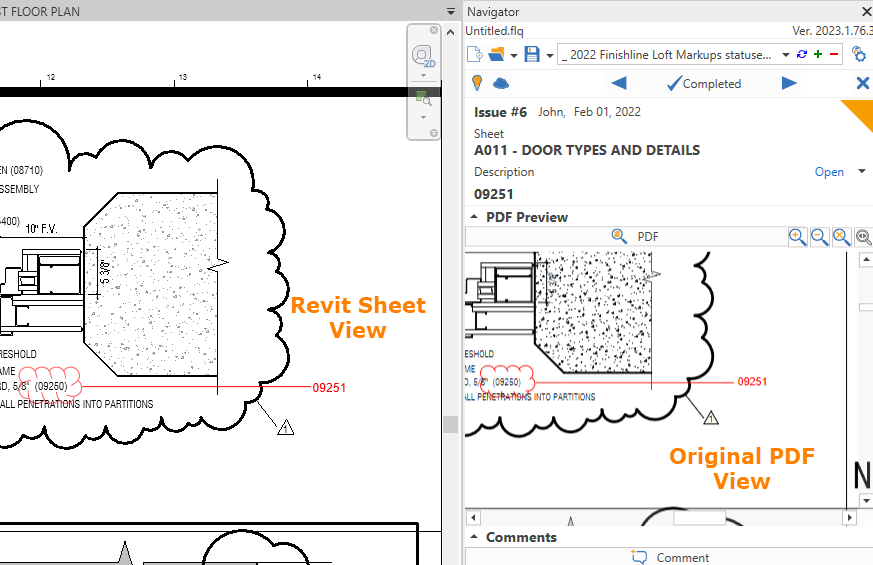
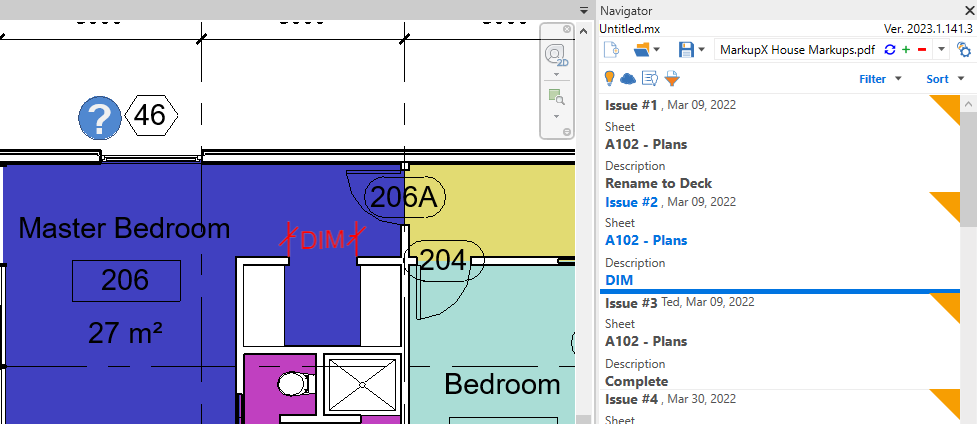
Once an Issue/Markup has been selected, it will highlight in Blue and automatically open the appropriate sheet and zoom to the markup.
The image below shows the result when selecting an Issue/Markup in the Navigator.
# Open/Edit/Close a Markup (Edit View)
Editing a markup while using MarkupX means addressing the markup in Revit and then closing out the markup or changing the status. To close it out or to change the status, an Issue/Markup needs to be opened for edit.
- In the Navigator Panel, double-click on an Issue/Markup.
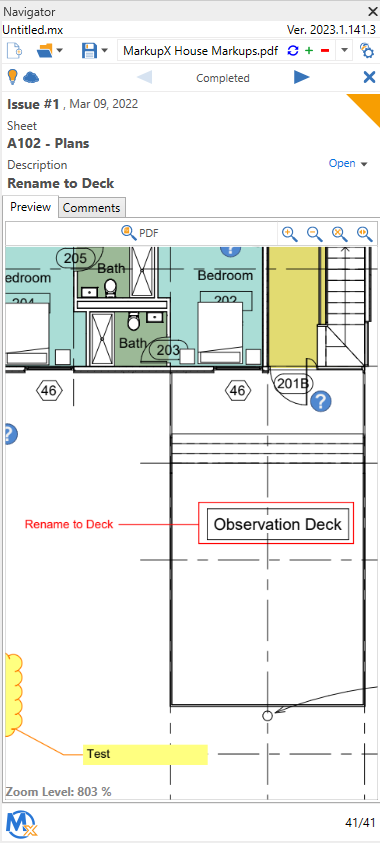
Once you double-click on a Markup, the Navigator Panel changes to only show that specific Issue/Markup. In this view, you can change the status, create comments, close and navigate to the next Issue/Markup.
The image below shows an Opened Issue/Markup after the user has double-clicked on it.
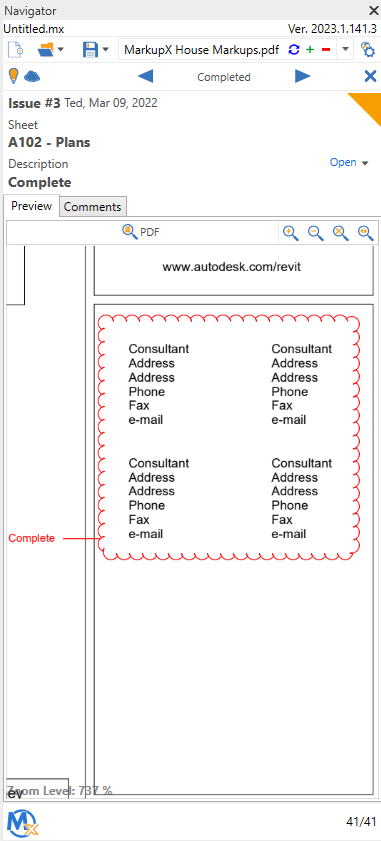
The Navigator Panel is now only showing information pertaining to one Issue/Markup. It is broken into 3 different areas.
- The top area shows all the information about the Issue/Markup.
- The second section displays the markup in the PDF.
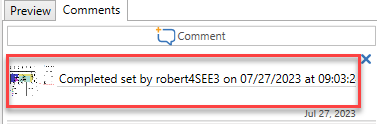
- The third section, below the PDF viewer, is the comments section.
The Default Status of all markups is Open. When a markup is completed, changing the status to Completed signifies to the reviewer that the Issue/Markup is ready to be reviewed in the Reviewer Tool.
Note: Statuses are saved in the project only and they do not save back to Bluebeam.
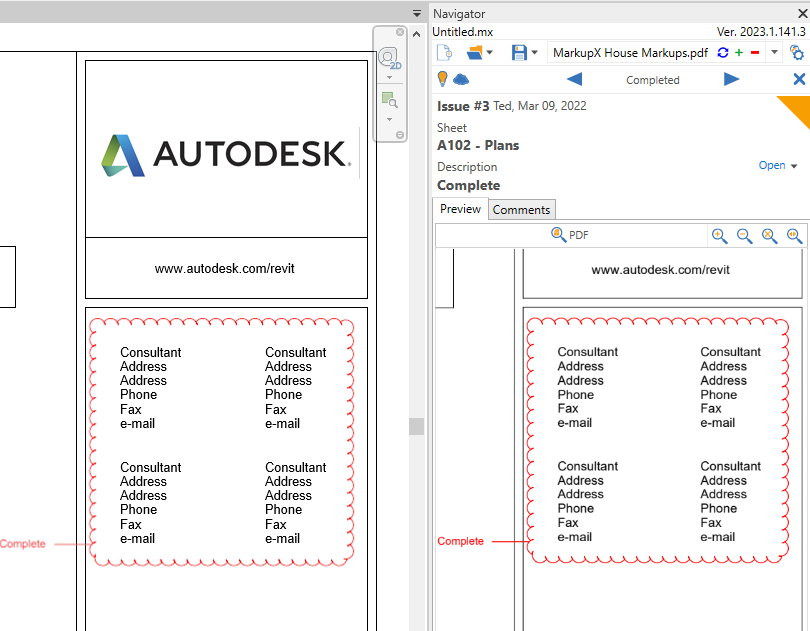
The image below shows the Revit view and the Navigator Panel. The Revit view is displayed on the left and the Navigator Panel on the right.
- Once the Issue/Markup has been resolved, click the Completed button.
By clicking the Completed button, it automatically changes the Status to “For Review” and the orange triangle changes to Blue. It also creates a comment and a snapshot of the Revit view while showing the changes that have been made.*
The Navigator Panel will automatically jump to the next issue while saving navigation time.